Key Takeaways
- Check how much RAM your PC is using for daily tasks. If it’s over 70%, consider upgrading; over 90%, definitely upgrade.
- Use Task Manager on Windows or Activity Monitor on macOS to see RAM usage.
- There are multiple ways to find out RAM type – we detail the most important.
Your PC or Mac’s RAM is its memory, and almost everything runs using it.
If the RAM in your computer operates at a slower frequency than what your motherboard supports, or if you’re using too little RAM for your daily needs, then upgrading your RAM can boost your computer’s performance. We’ll show you how to determine if you need a RAM upgrade. This includes checking its size, speed, type, and more. We have detailed steps for both Windows and Mac users.
Best DDR5 RAM: The fastest memory for your machine
If you’re on the cutting edge of PC gaming or building then DDR5 RAM is a must. In this guide, we’re rounding up the best DDR5 RAM we’ve tested.
What is RAM and why would you check it?
RAM (Random Access Memory) is a type of computer memory used to store data that is actively being used or processed by the CPU. It’s much faster than permanent storage, like a hard drive or SSD, which allows for quick access to data needed for running applications and tasks.
When someone says “check how much RAM I have left,” they usually mean to see how much RAM is available for use out of the total installed in the computer. It’s about determining how much memory is currently being used by the operating system and running applications, and how much is free for additional tasks. This is important because running out of RAM can slow down your computer significantly, as it starts using slower disk-based memory to compensate.
How to check how much RAM you have
Checking the amount of RAM in your computer is a straightforward process, whether you are using a Windows PC or a Mac. Here’s how you can find out:
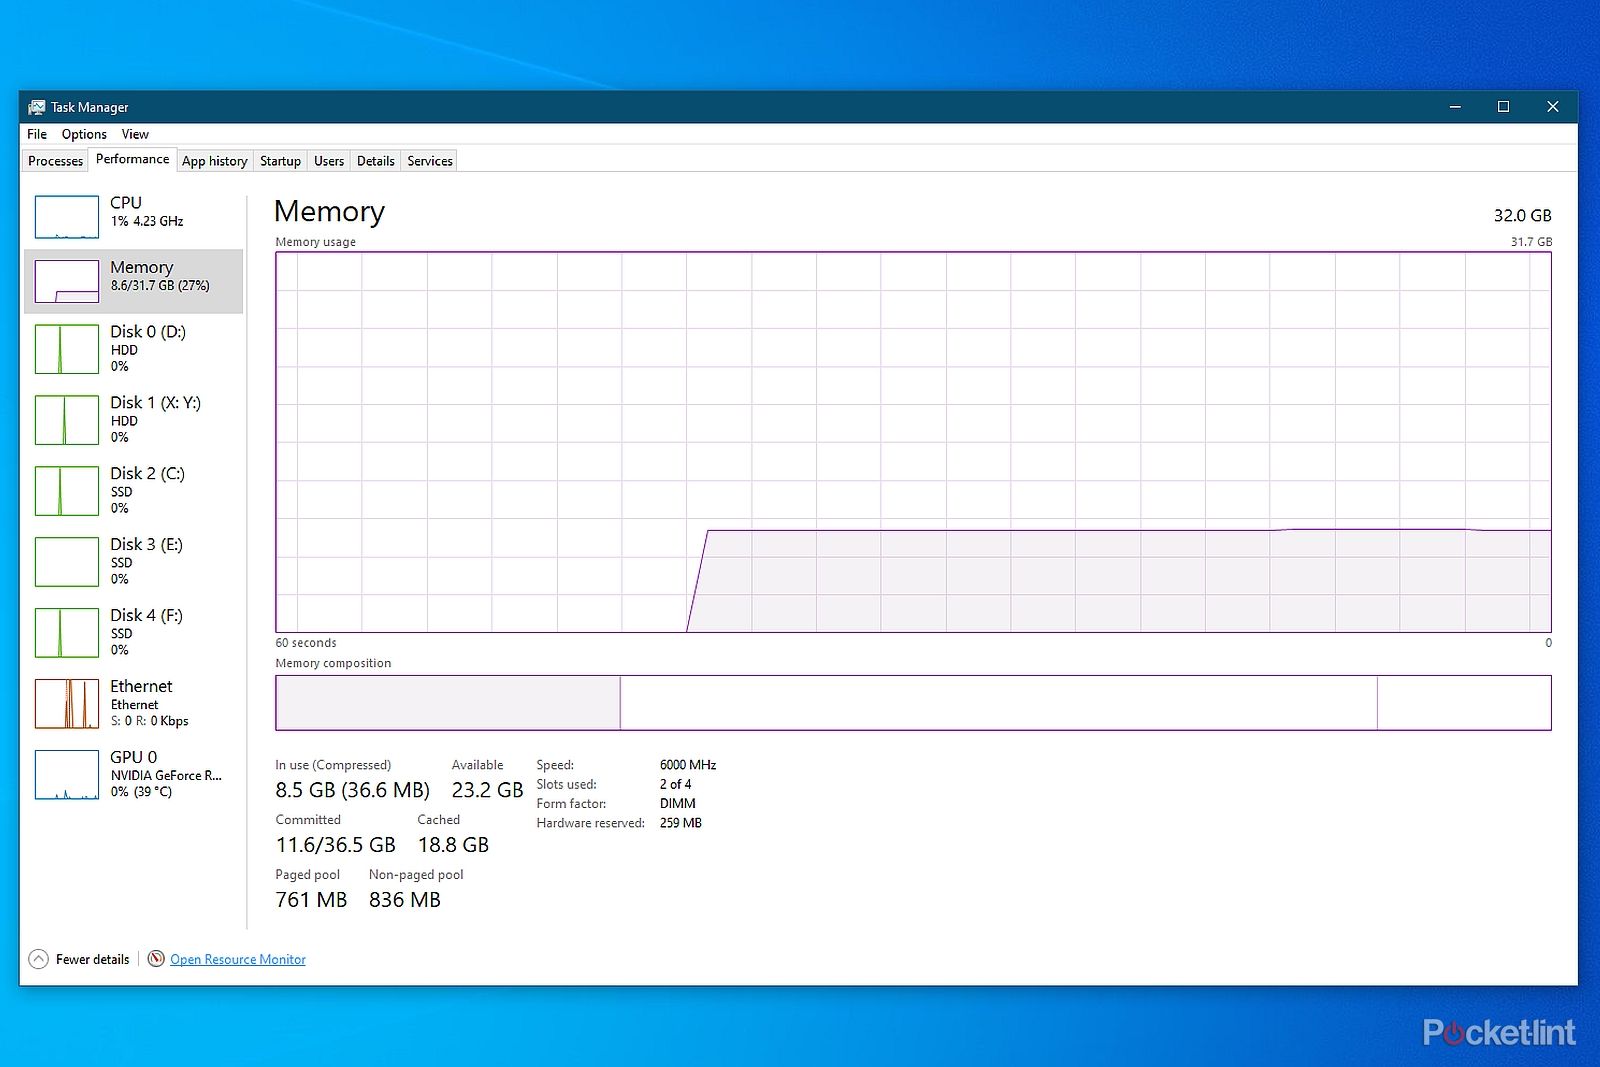
The Memory tab of the Windows Task Manager shows most of the details you need.
Windows PC
On Windows 11 or Windows 10, open the Task Manager. There are multiple ways to do this:
- The quickest way is by pressing Ctrl + Shift + Esc.
- Alternatively, right-click on the Taskbar and select Task Manager from the context menu.
- You can also press Windows key + X and select Task Manager from the Quick Link menu.
- Another method is to press Ctrl + Alt + Del and then select Task Manager.
- Or, press the Windows key and type “Task Manager”.
Once the Task Manager is open, go to the Performance tab and select Memory from the sidebar. The bottom pane of this section will show details about your RAM, including the installed amount, current usage, speed, and form factor.
Pocket-lint
Mac
On macOS, open the Activity Monitor. This can be done in several ways:
- Through the Finder: Navigate to Applications, then Utilities, and find and open Activity Monitor.
- Or, use Spotlight search: Click on the magnifying glass icon on the macOS menu bar, or press Command + Space. Then type “Activity Monitor” and select it.
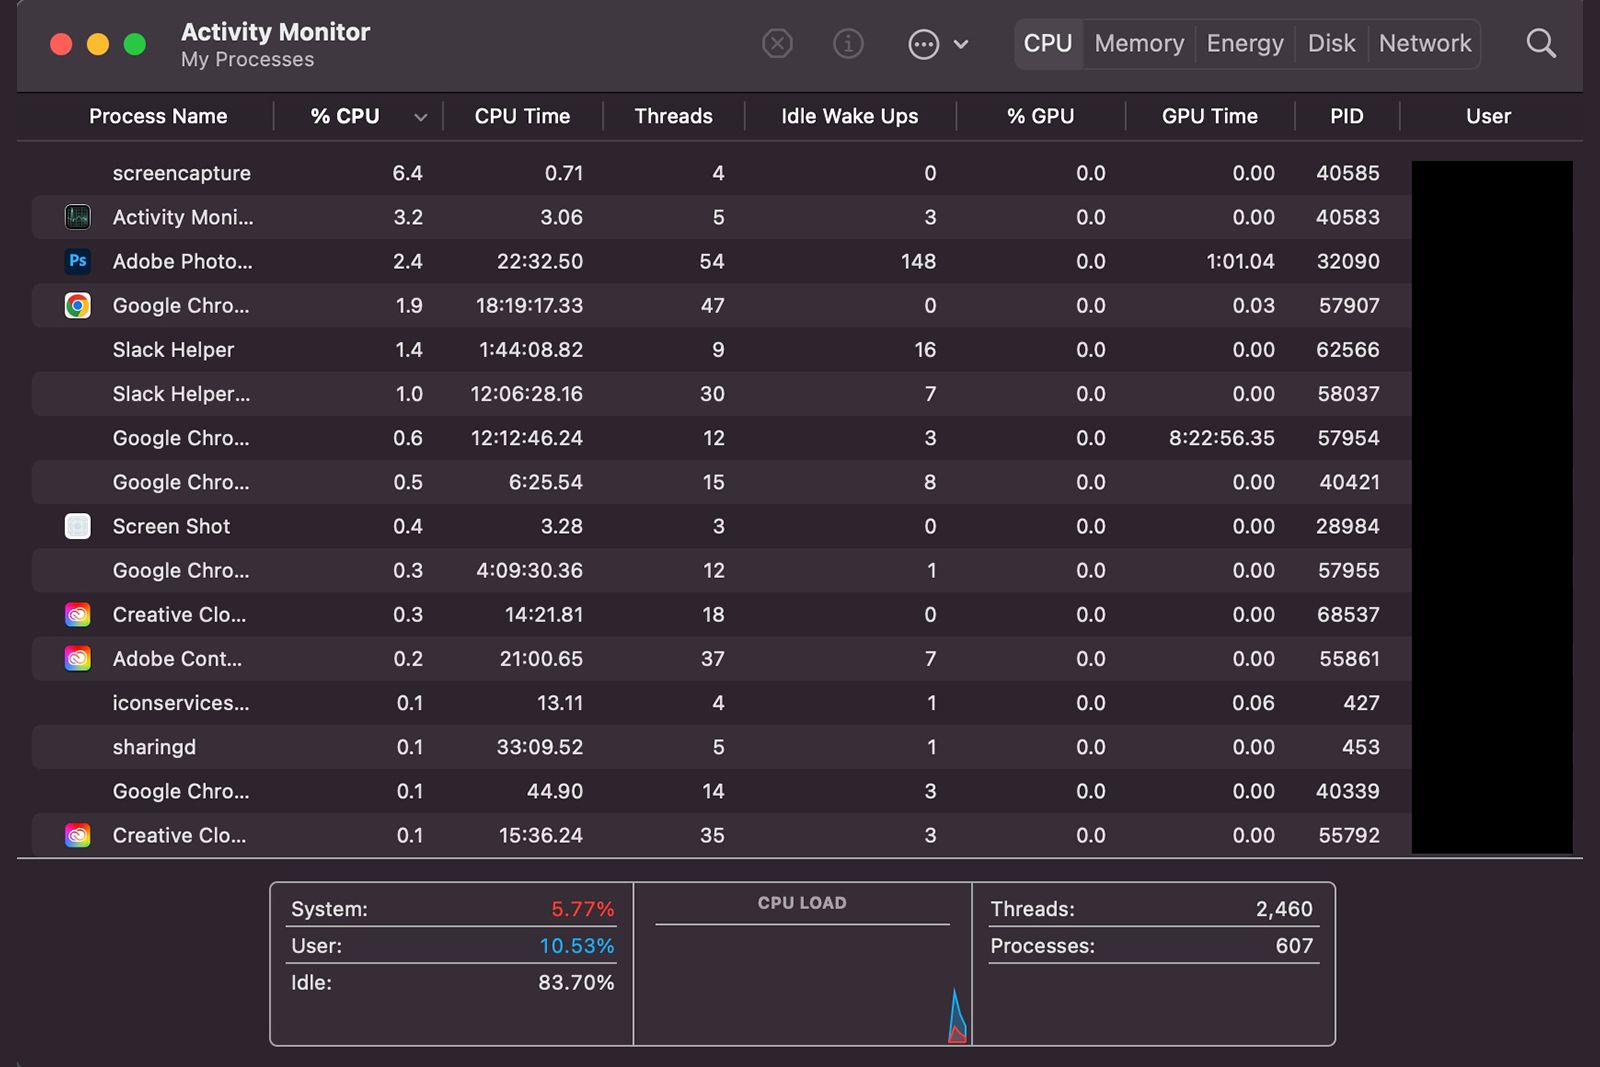
In the Activity Monitor, open the Memory tab. At the bottom pane, you’ll find information about the amount of memory installed and how much is currently in use.
How to tell if you need to upgrade your RAM
Now, using either Windows’ Task Manager or macOS’ Activity Monitor, you can monitor how much RAM your PC is using for your daily tasks.
The key test to determine if you need a RAM upgrade is to observe how much RAM is consumed during your usual computer activities. For instance, if you typically use your computer for word processing and browsing, open several browser tabs and a few Microsoft Word documents to replicate your common usage.
If you find that more than 70% of your RAM is in use, you might want to think about upgrading your RAM. It’s not urgent, but it can improve performance. However, if over 90% of your RAM is being utilized, it’s highly recommended to increase your RAM capacity. For macOS users, Activity Monitor includes a “Memory Pressure” graph: green indicates sufficient RAM, yellow suggests you may eventually need more, and red signals an immediate need for more RAM.
Before upgrading your RAM, consider a few factors, such as background processes and unnecessary programs that may be consuming memory. Additionally, check how much RAM your motherboard and processor can support. If you’re already at the limit, it might be time to consider upgrading your entire machine.
Check if you have unwanted programs using up RAM
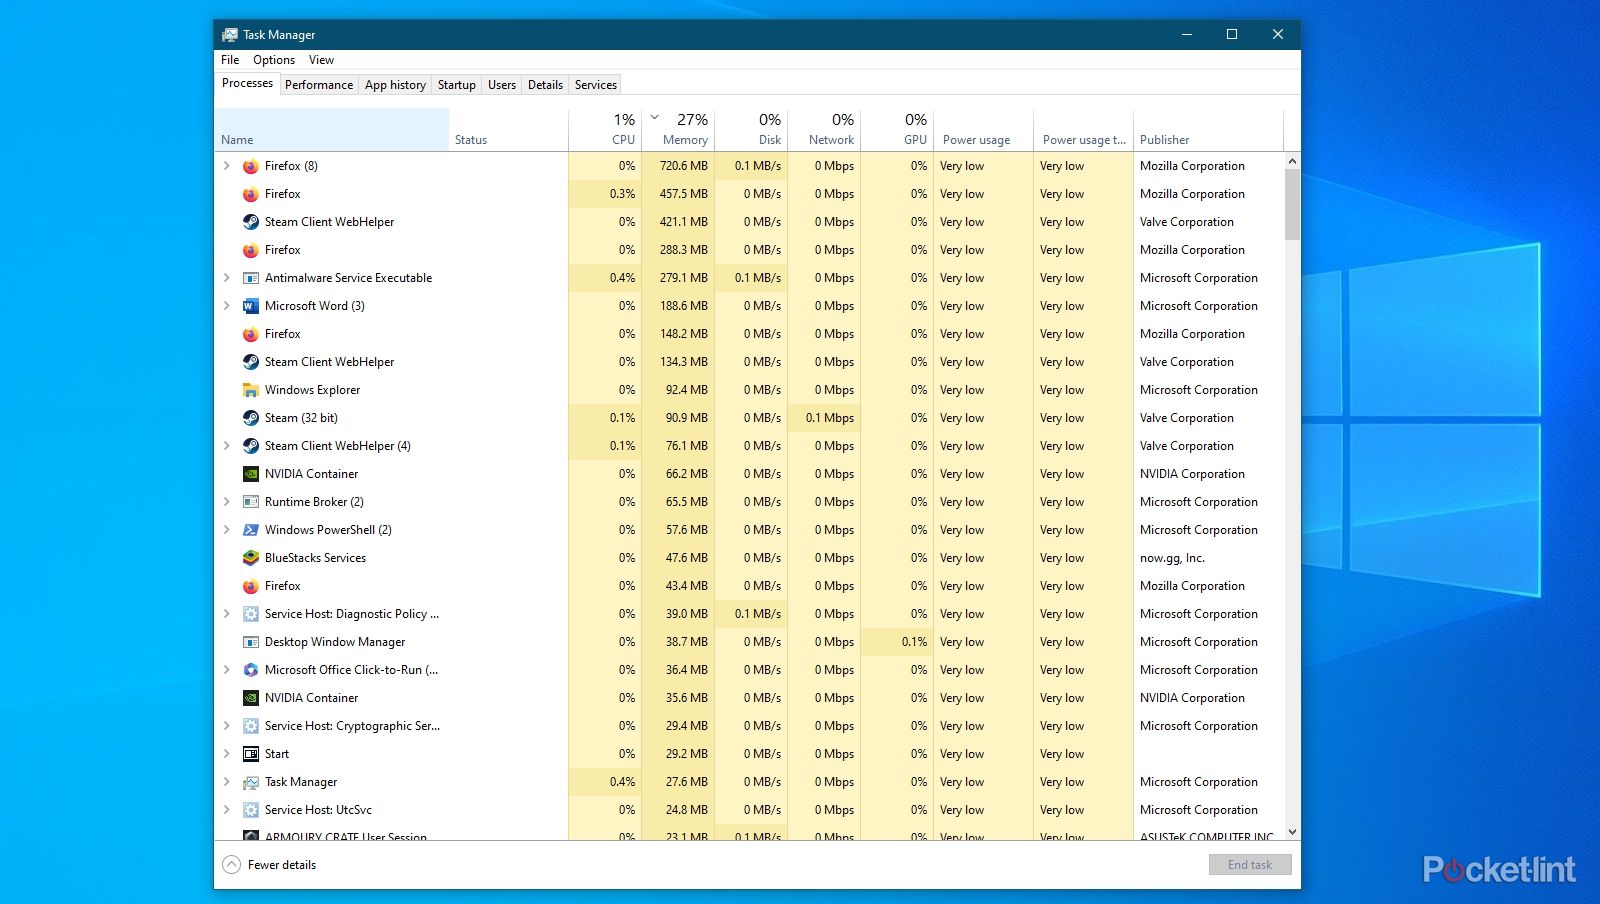
To see if unwanted programs are consuming your RAM, on Windows, go to the Processes tab within Task Manager, or on macOS, use the Memory tab in Activity Monitor.
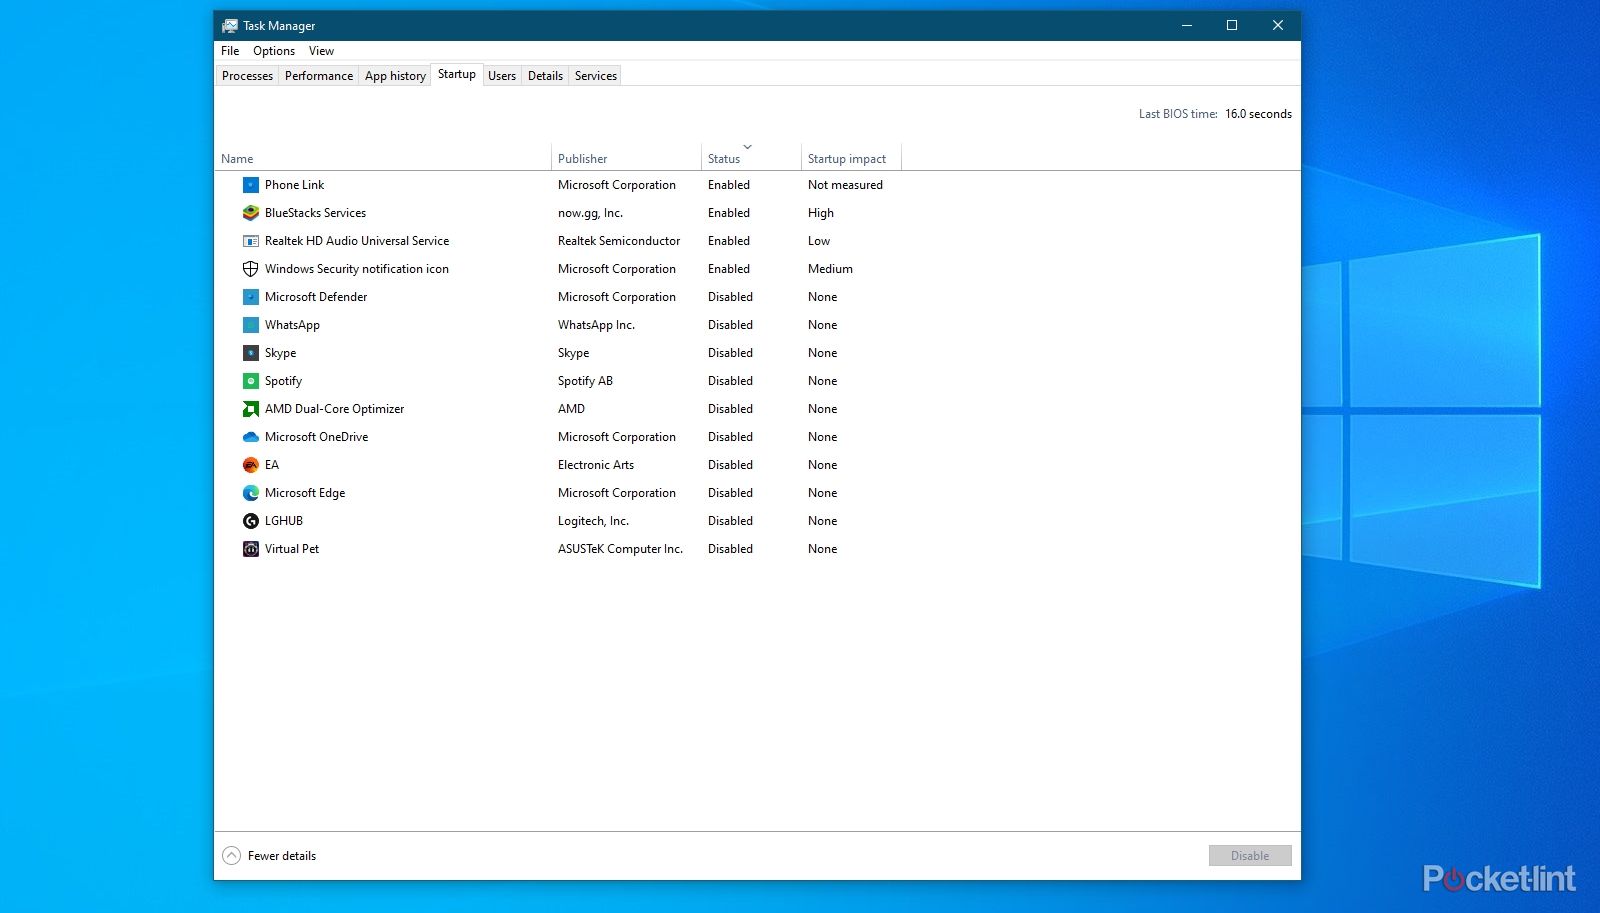
Here, sort the list by memory to see which processes or programs are using the most RAM. If you find any non-essential applications (make sure they are not system files by Microsoft or Apple) taking up a lot of memory, these might be apps that were loaded during your PC’s startup. On Windows, visit the Startup tab of Task Manager to view and disable unnecessary startup apps. For macOS users, go to System Settings, select General, then Login Items, and disable any unwanted apps found under Open at Login and Allow in Background.
If, despite making these adjustments, your PC continues to use more than 70 percent of your total RAM for everyday tasks, it’s likely time to consider upgrading your RAM. To make an informed decision about which RAM to purchase, you need to determine the specific type of RAM your machine currently uses, including details like DDR generation, frequency, form factor, voltage, and more.
This leads us to the next section.
How to upgrade your RAM: Boost your memory on either a laptop or a desktop
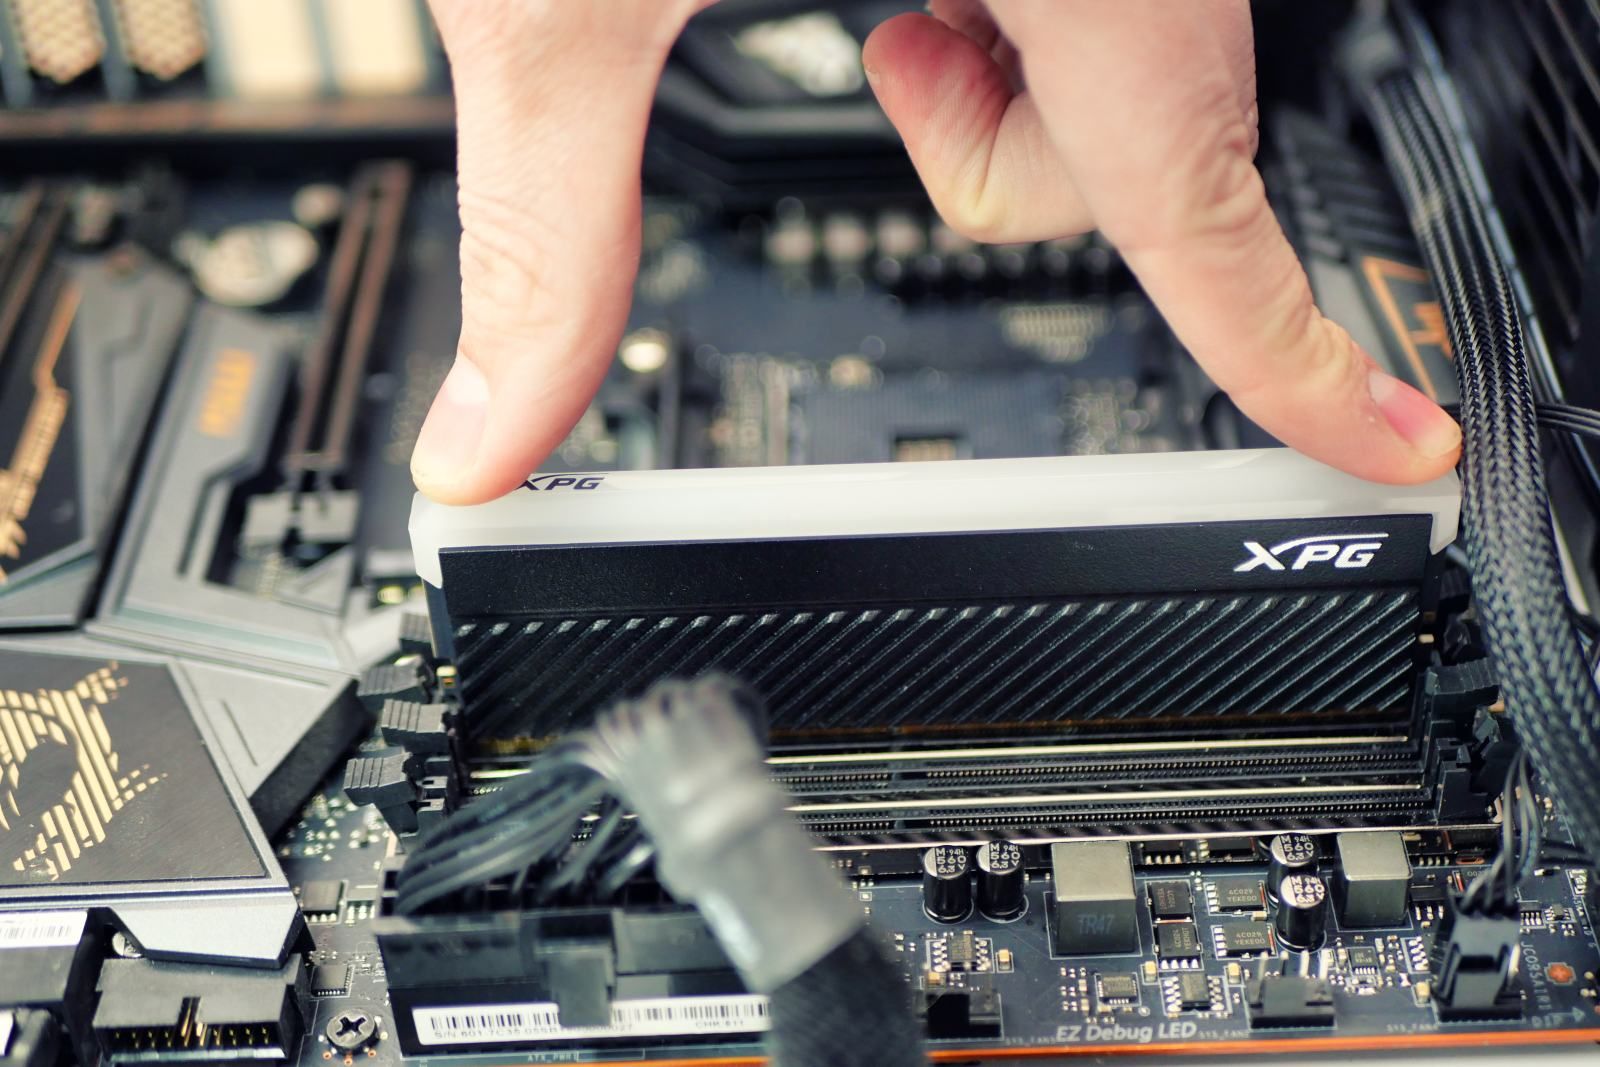
Upgrading your RAM is a pretty easy job. So we’re showing you how to do it.
How to tell your type of RAM
Windows and macOS offer a few methods to determine the type of RAM your PC is using. However, for the most comprehensive details on Windows, third-party tools are recommended. These tools provide extensive information, from the manufacturer to CAS latency, in an easily understandable format and all in one place.
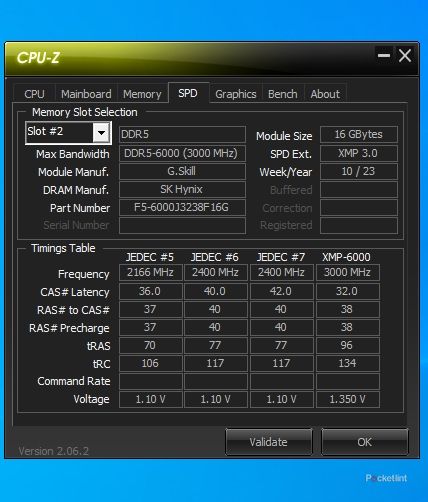
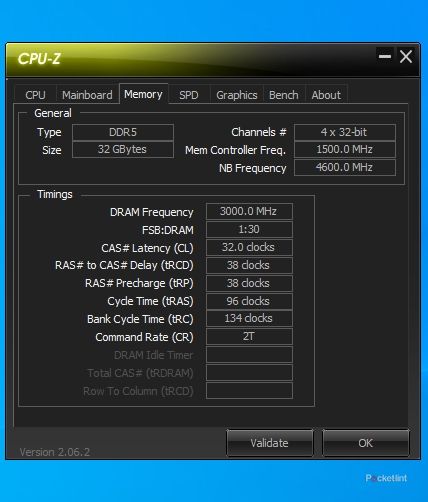
CPU-Z for Windows PCs
CPU-Z is a highly popular freeware system information tool for Windows. It is available in both an executable setup file and a ZIP version. The latter is particularly handy for use on computers where installing new programs is restricted. To find details about your RAM, navigate to the Memory tab in CPU-Z. Here, you’ll find information on RAM type (e.g., DDR3, DDR4, DDR5), size, frequency, and CAS latency. For specific details on the modules, like the manufacturer, part number, module size, and which slots they occupy, go to the SPD tab.
Pocket-lint
PowerShell for Windows PCs
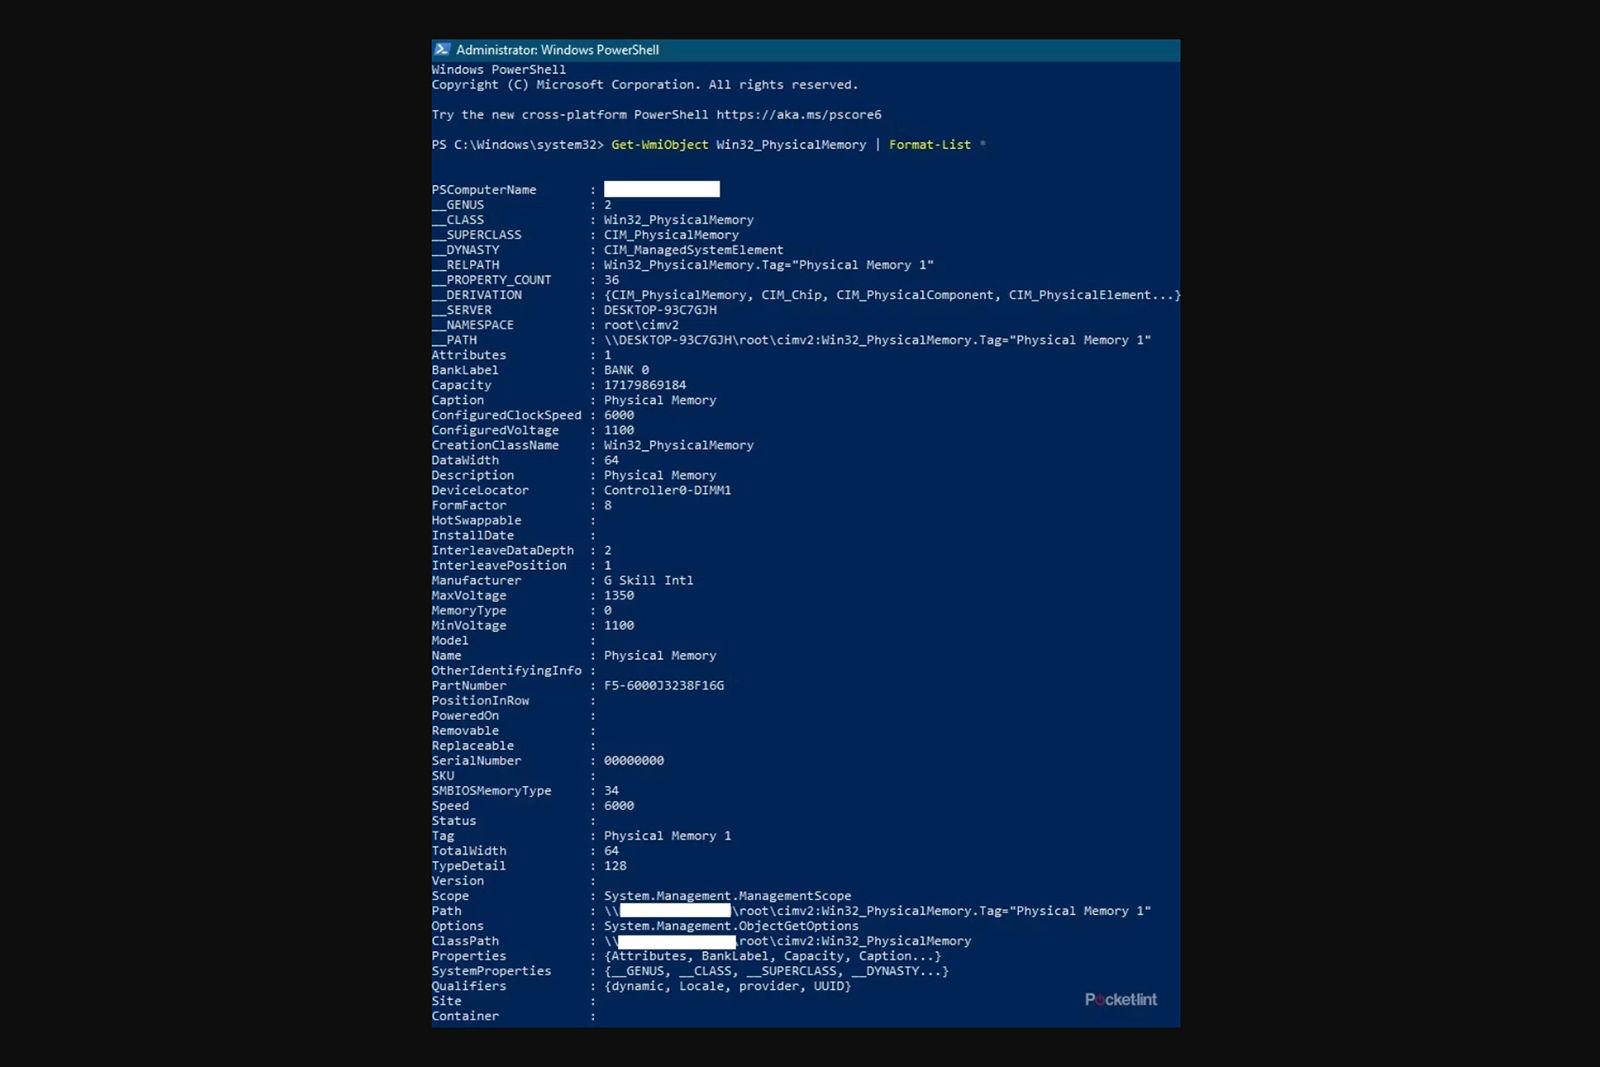
If you’re unable to use CPU-Z for some reason, you can still obtain detailed information about your RAM using a Windows PowerShell command. To open PowerShell, either press Windows key + X or right-click the Start icon. From the Quick Link menu that appears, select Windows PowerShell (Admin). Another way to open it is by pressing the Windows key, typing PowerShell, right-clicking on it, and choosing Run as administrator.
Once PowerShell is open, type in the command: Get-WmiObject Win32_PhysicalMemory | Format-List *. This command will provide a comprehensive list of details about your RAM. To quickly identify the exact type of RAM you have, copy the value from the PartNumber field and search for it on Google to find an exact match.
|
Numerical Value |
RAM Type |
|---|---|
|
0 |
Unknown |
|
21 |
DDR2 |
|
24 |
DDR3 |
|
26 |
DDR4 |
|
28 / 34 |
DDR5 |
The MemoryType field will show a numerical value, so you will need to refer to the table above to find out which RAM your system is using. If MemoryType shows “0”, which means that field isn’t properly recognizing your RAM. In that case, you can also refer to the SMBIOSMemoryType field. It may contain one of the above table’s values, or it may show “28 or “34”, both of which refer to DDR5 RAM.
Pocket-lint
Command prompts for Windows PCs
This approach is slightly older and might not recognize the latest memory types.
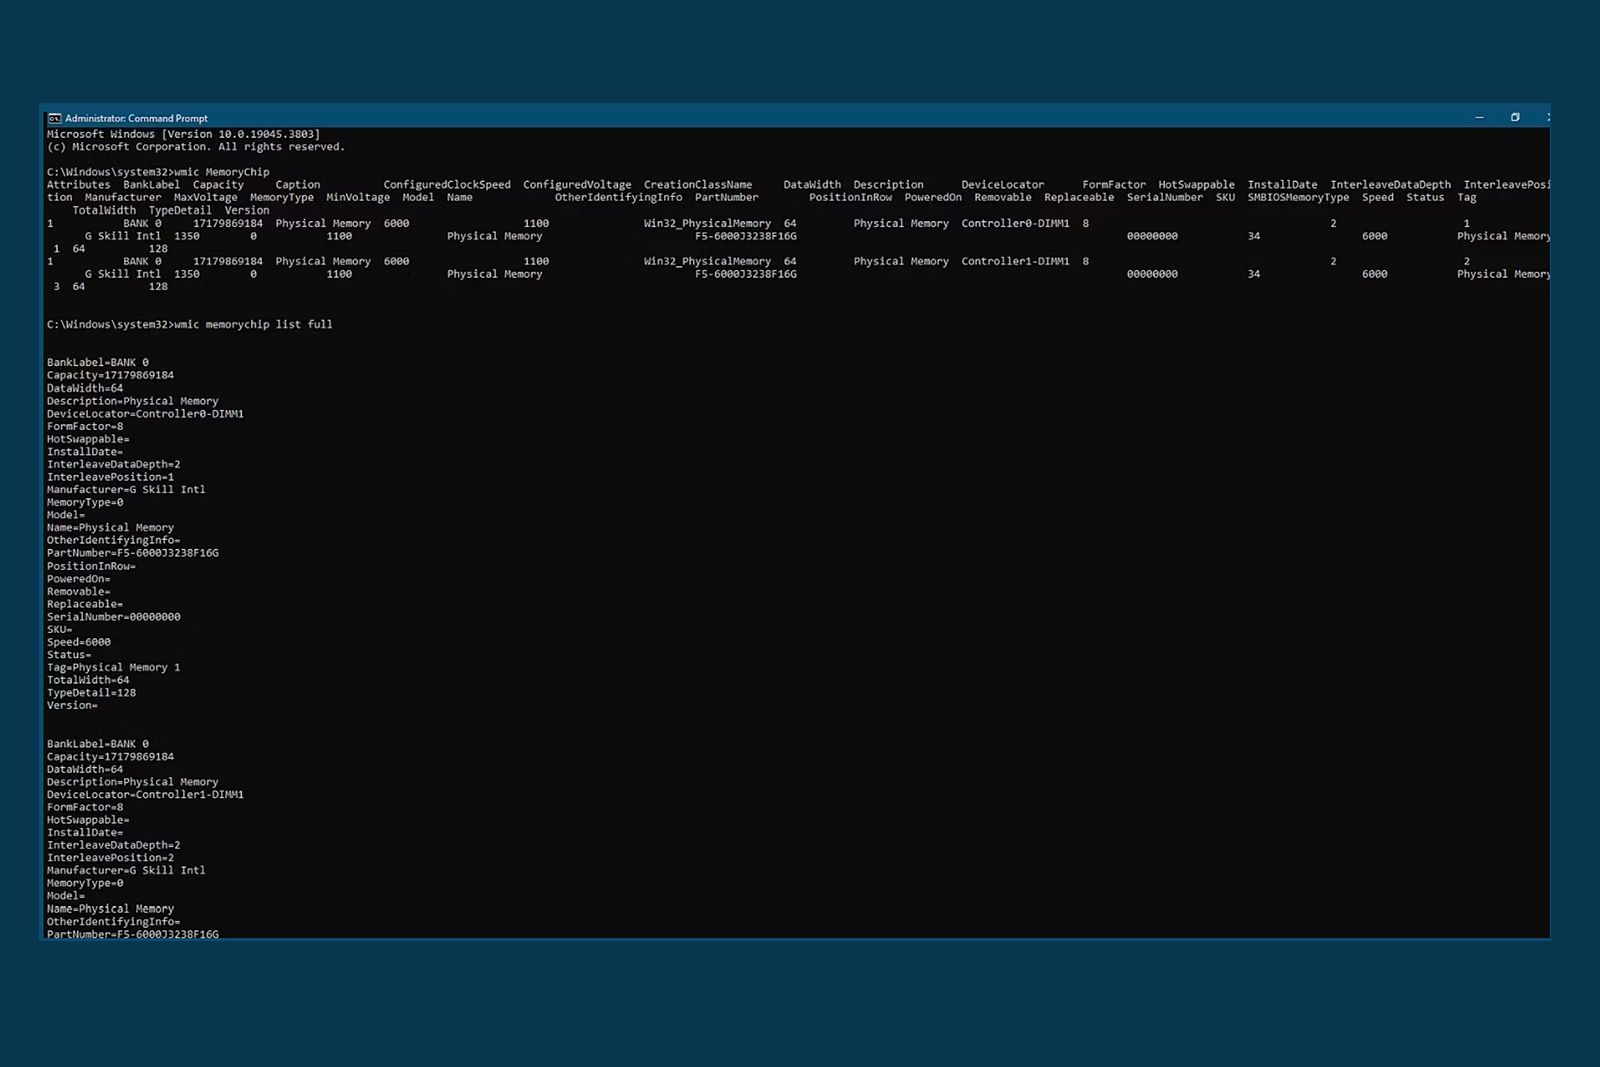
To use Command Prompt, click the Start button, type Command Prompt, right-click the application, and choose Run as administrator. In the Command Prompt, enter the command wmic memorychip list full. This will display all the details about your RAM modules. Refer to relevant documentation to interpret the MemoryType values. If it shows MemoryType=0, the function may not be recognizing the RAM, possibly indicating it’s DDR5 RAM. To verify, use the command wmic memorychip get SMBIOSMemoryType. If it returns 28 or 34, it confirms the RAM is DDR5.
Pocket-lint
System Information tool for Macs
To check the RAM type on macOS, the System Information tool is the most effective. There are two main methods to access this tool.
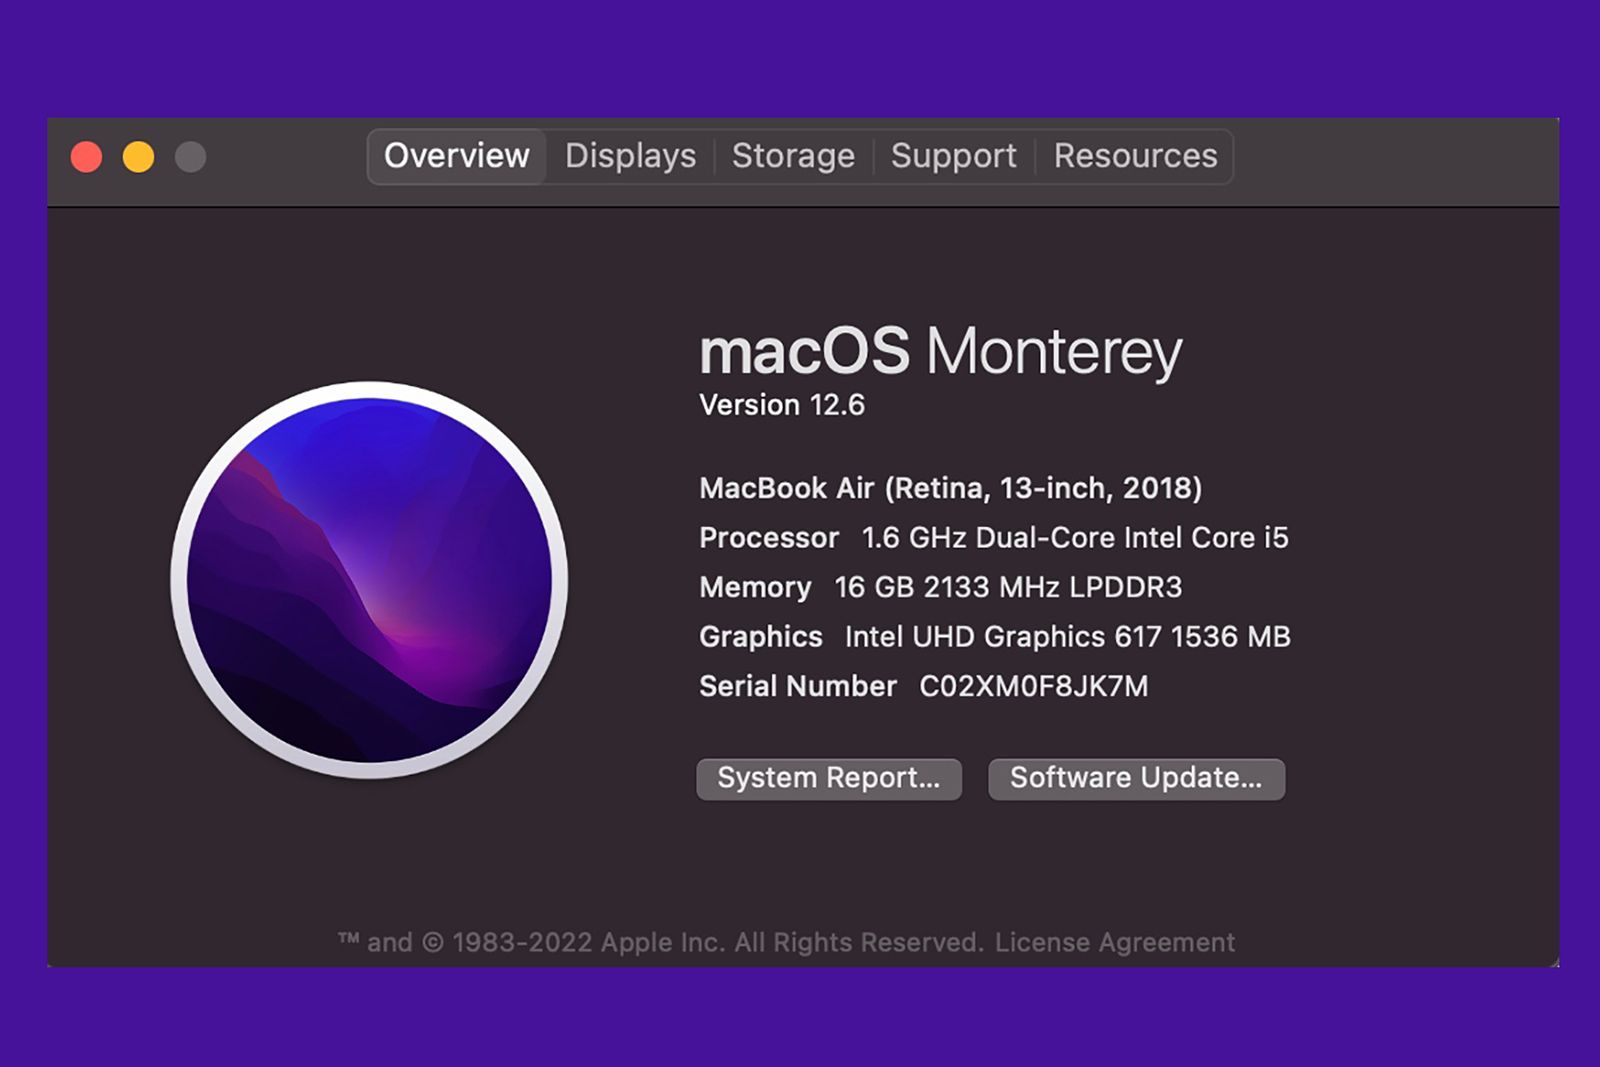
- The first is to open the Apple menu and select About This Mac. In the window that appears, look for the Memory field. This shows basic details like the amount of RAM, its frequency, and type. For more comprehensive information, click the System Report button, which opens the System Information app.
- Alternatively, you can open the System Information app directly using Spotlight search. Click the magnifying glass icon to open Spotlight, then type System Information.
Once the System Information app is open, navigate to the Hardware section in the left-hand menu and then to the Memory section. Here, you’ll find detailed information about your RAM, including size, type, speed, manufacturer, and part number. You can use Google to search for the manufacturer and part number codes to identify the exact RAM modules in your Mac.
Best RAM: Equip your PC with super-fast memory
Finding the best RAM for your rig is essential, whether you’re looking to upgrade your current PC or are starting a build from scratch.
Final advice
If the methods mentioned earlier don’t provide all the RAM type details you need, a last resort is to physically open your machine and check the label on the RAM stick. However, unless you have a desktop PC, proceeding with this step is generally not recommended. That’s it for all the details on how to find out what RAM type your PC has. We hope our upgrade advice was useful.
Trending Products

